Wednesday, December 26, 2012

A Game Ends, But A New Life Begins


In my last post, I excitedly mentioned participating in a Secret Santa craft gift exchange with people who played my favorite game, Glitch.  Sadly, not too long after I posted, Glitch announced that they would shut down as of December 9, 2012.  In some ways, I suppose the Mayans were correct, and only off a few weeks - the most beautiful online world I have ever had the privilege to participate in ended.  Once I found out the game was over, I threw myself into a number of Glitch-related crafts.  For my roommate, whom I met in game, I took a teddy bear I bought on sale at a T.J. Maxx, and I turned him into an emo bear:

The original teddy bear

Ripping his embroidered eyes out

An eye half pulled out

An eye-less teddy bear

New, more Glitch-like eyes added

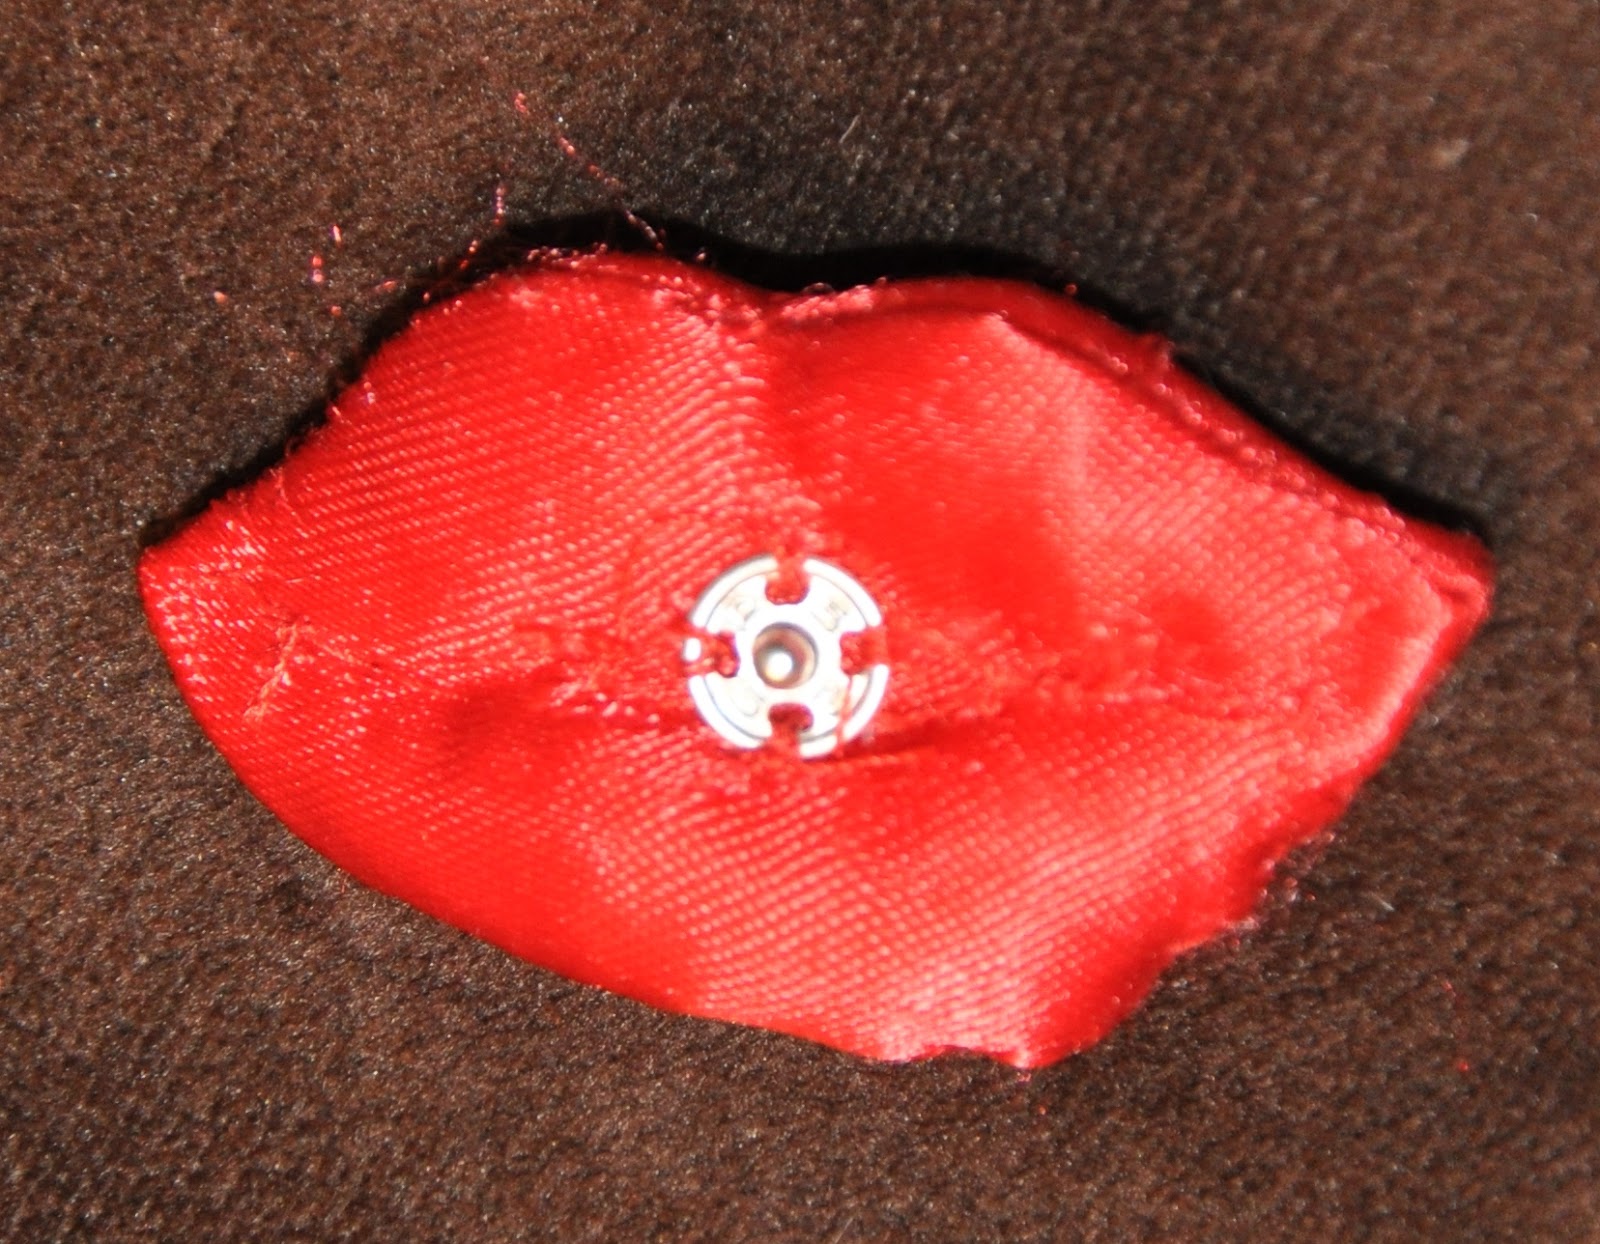
The completed emo bear with the "falling off" tummy patch, striped paw pads, and add on lips and moon.
As you can see, the lips can be snapped on or left off...
... and the moon is held on with elastic
A close up of the face with...
... and without the lips
The completed bear in all his glory!

The original emo bear I was attempting to replicate.


While I feel like my emo bear is a close approximation, it just wasn't enough to show my appreciation for such a wonderful game.  I ran a Secret Santa with a group of my friends, and I began thinking that I might use my newly-found skills in stained glass to create something awesome.

I started with the word Glitch in their font and shape:
I just used print screen from their home page


I then began creating a pattern based on it:

I used Glass Eye to create this.

I chose the pinkish/red based on what I thought my recipient would like.  I went to Anything in Stained Glass, and started digging through all of their pinks, trying to find the right shade.  Sadly, it appears that pink is a more rare color because gold is used in the coloring.  After digging out the closest shade I could get, I took my prize home and began work:

I cut out all the pieces.
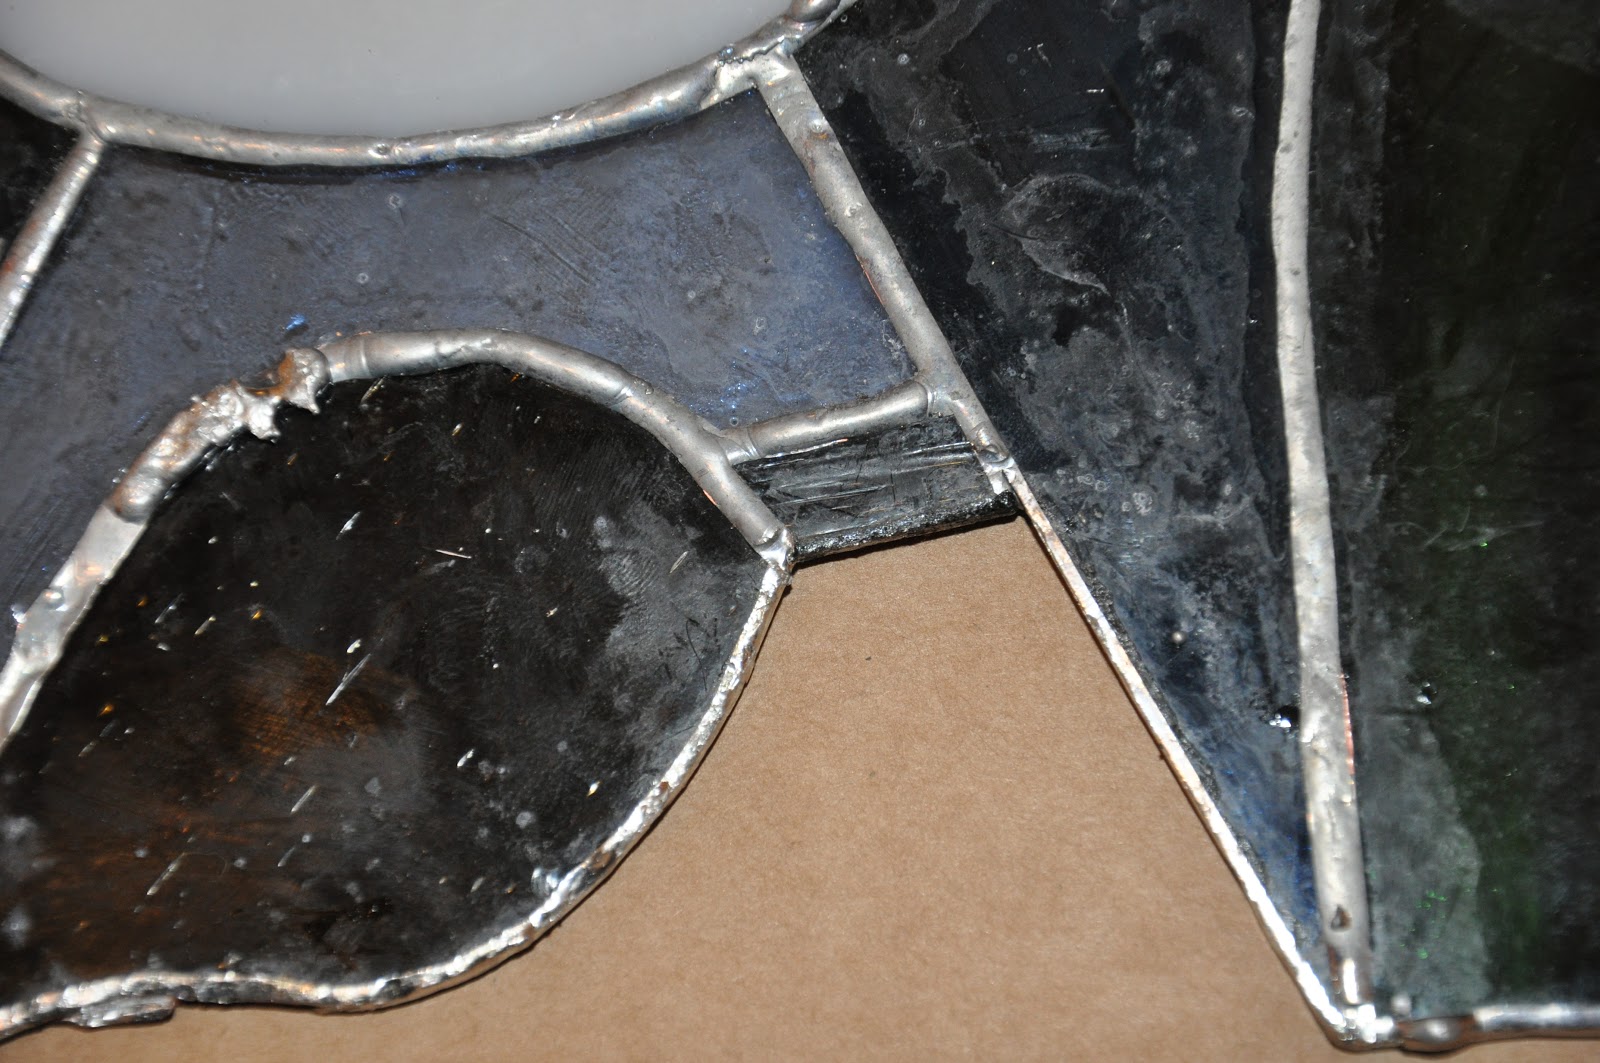
I foiled and soldered the piece.
I framed it and added hooks to the sides for a chain.

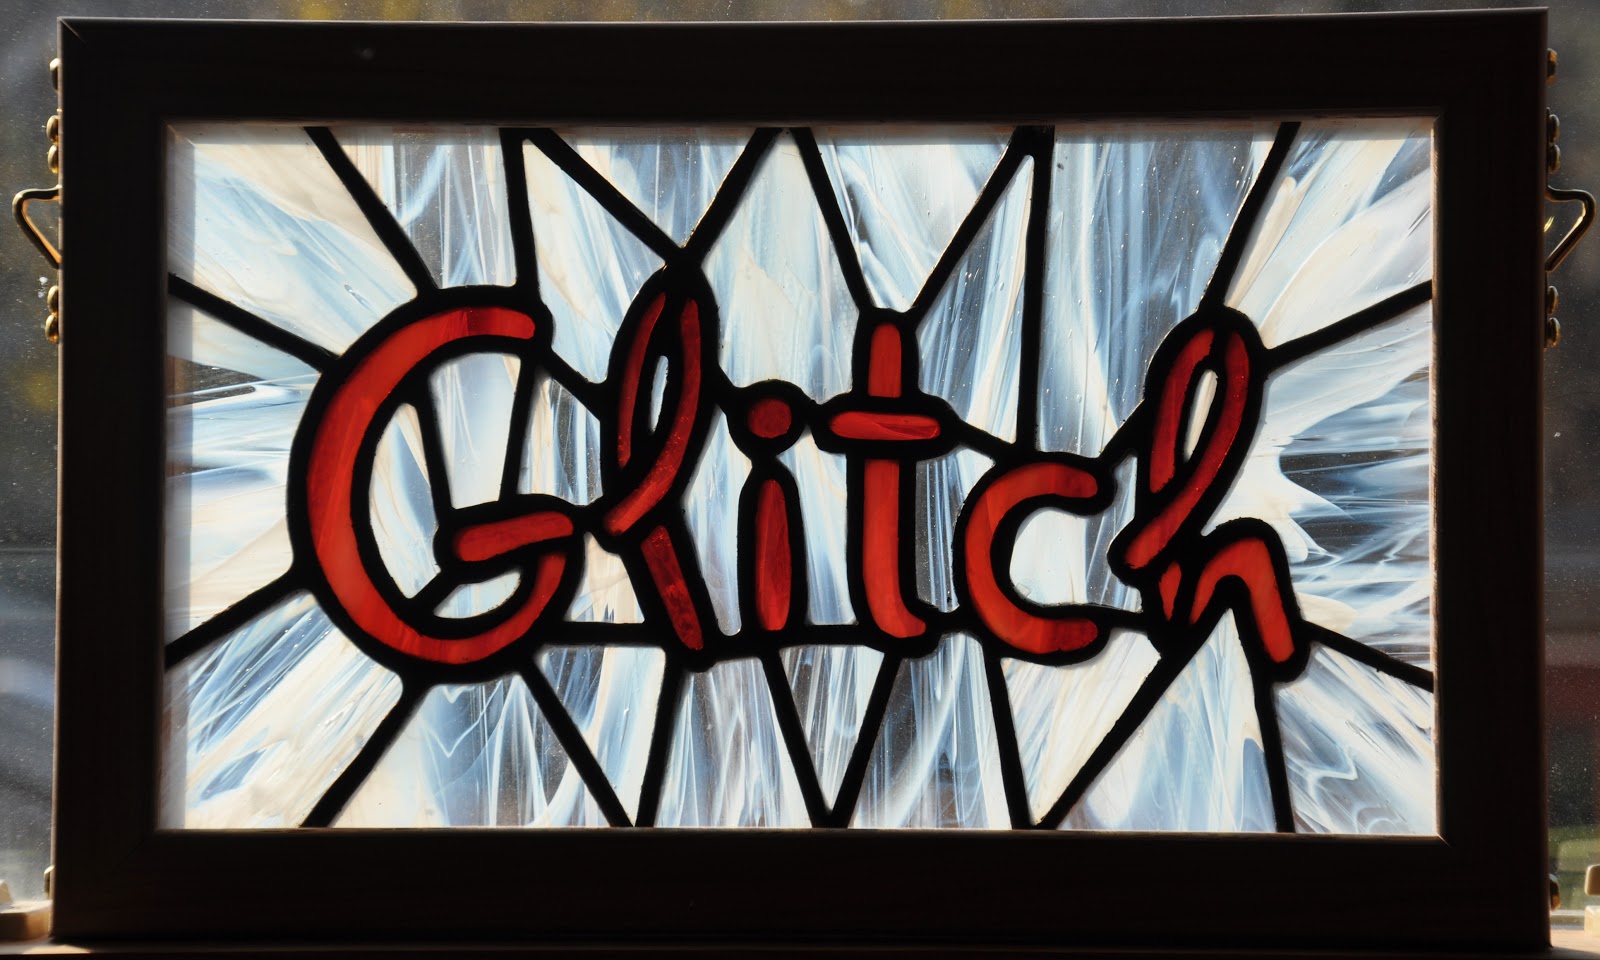
And here is a picture of it in the light.
This time, I only had one issue - I broke the c while soldering.  It was an easy replacement, and this piece went much smoother than the last.  I sent the piece off to my recipient, and I've been told she absolutely loves it.

At my roommate's, husband's and online friends' encouragement, I decided to speak to Tiny Speck regarding making more stained glass pieces for sale, especially cubimals.  They responded:

"There are a couple of things we need you to do:

1) Don't use the Glitch trademarks (logo/name) in any of the work you sell. The stained glass "Glitch" looks amazing but it's going to have to stay in your personal collection.
2) When selling things, don't say anything that might lead someone to believe that we created or endorsed your work.

Thanks for checking with us!"

They seem to have missed that I gave this piece away already; however, it's my understanding that it's ok because I did not make it for profit.  Sadly, this means I cannot make and sell any more of the glitch piece above.  However, I have already designed and made three cubimal stained glass items I will show off in another post.  (Please note that Tiny Spec/Glitch have not created nor endorsed these items!!)

Wednesday, November 14, 2012

Mario COMPLETE!

On Monday night, I completed the solder on the Mario piece.  I decided that I wasn't sure if the edges would fit perfectly into the wood frame, so I didn't want to put the patina on the piece until I double checked everything.  So Tuesday, I loaded up my miter saw, patina and wax, and my stained glass, and made my way back to Anything in Stained Glass.  Jack helped me check everything fit into the wood framing material and then we patina-ed and waxed the Mario piece.  After that, we pulled out the miter saw a cut the oak framing material to fit the piece.  We screwed everything together, and VOILA! the Mario piece is complete!

Here it is in all its glory!

I've already designed my next two pieces of glass, both based on the fabulous game Glitch.  The first piece is for a secret santa, so I will hold off posting the blogs on it until it is complete and mailed off.  Luckily, it is a small piece, so I should be able to post things rather soon.

Tuesday, November 13, 2012

One Step Back, Two Steps Forward!

So after a highly successful trip to Anything in Stained Glass, I came home and continued working on soldering my Mario piece.  Everything was going along swimmingly until I committed a fatal error.  I'm not sure exactly what I did, but I suspect I used the hot soldering iron to pick up some solder on a piece of glass, which caused the glass to crack.

It's kind of hard to see, but I've circled the crack in the glass.

After muttering a few words that I shouldn't repeat here, I decided that this piece was too nice to allow a cracked bit to remain.  I did some research on the internet and found a website explaining how to remove the old piece:  http://www.freepatternsforstainedglass.com/repairing-copper-foil.html

First I took my glass cutter and scored the broken piece, then I tapped the underside.  This created more breaks in the piece until I could finally pull some of it out with needle nose pliers.


 After pulling out the first piece, I began carefully pulling out all the other pieces and using my soldering iron to weaken the join between the foil on this piece and the pieces surrounding it.  Once I did that, I pulled out the old foil and removed all the extra solder possible, leaving me with a perfect hole where the broken piece used to be.

Sorry - I took this picture from the back side, but you get the idea.
Then, I cut a new piece and ground it until I could get it to comfortable fit in the hole.  I foiled it and then prepared to put it in.  This step has one tricky bit - the solder on the other side means that you can just lay the piece in - it will fall through and be at the wrong height.  The instructions on the website above suggests laying some quarters down underneath your new piece and using them to get the correct height.  The problem with this solution is if your beads of solder on the backside aren't perfectly quarter height, you are out of luck.  When Jack from Anything in Stained Glass assisted me with refoiling and inserting the pieces of glass that I had pulled out of the edge, he showed me a really great trick.  You take part of a business card, and you fold it in half twice lengthwise.  The cardstock then creates a slight spring to it.  If you slide that under the piece you are working on inserting, the piece will lift.  You can then press it lightly down to the corrected height and tack it into place.


Once I did that, I could then rough solder the piece and then complete the finish soldering.  As you can see, it's nearly impossible to tell that the piece of glass was replaced.


And now, you can see what the soldering looks like now that it's mostly complete!


All that's left is to patina the solder, wax it, and frame the piece. 

Monday, November 12, 2012

Best Stained Glass Shop EVER!

So I was moving right along in the Mario stained glass piece.  In my spare time, I was already designing my next piece, and I knew I needed some new colors of glass.  Last Wednesday, I did some research and found a stained glass shop in Frederick, MD, and I went up there to buy glass.  I walked into Anything In Stained Glass and was immediately impressed by their selection.  This place was a WAREHOUSE of different types of glass.


I probably spent two hours just wandering the store and trying to pick just what I needed.  I had some difficulty finding the exact color I wanted, but the staff were incredibly helpful and after scouring the store, I chose a bunch of pieces and headed to check out.  I happened to mention that I had no crates to store my glass in and the staff threw one in for free. ("We were just going to throw it out anyway.")  While checking out, I spoke to the staff about my foil issues on the Mario piece.  They had some suggestions, but the thing that really stuck in my mind was that they asked what type of foil I was using.  Evidently, the sticky on the foil can age and easily lose its adhesive properties, especially for certain brands of foil.  I had no clue what foil I was using, but once I got home I began really looking at the foil.

After doing some research, I determined that I should probably remove the pieces where the foil was coming off.  This led to a complete disaster and a lot of tears.  As I would remove one piece, foil from the next piece would come off and one piece of glass broke.  By the end of the night, I was certain that I would have to take the entire piece apart, buy new foil, refoil everything and in essence, start over.  Needless to say, I was in tears and almost determined that I would quit stained glass.

Pieces removed due to bad foil

More foil coming off!

The foil came off the Tanuki leaf when I pulled out the piece below it!
More foil came off!


So Thursday, I packed up my sorry piece of stained glass and a package of the suspect foil, and made my way back to Anything in Stained Glass to buy new foil.  I walked in the door, and was immediately greeted by staff who remembered me from the day before.  I quickly learned that Anything in Stained Glass is a family-owned store, and they really treat their customers like members of the family.  Jack, the patriarch of the family, came over as I explained the problem and asked to see the Mario piece.  As I talked with him, we determined that my suspicion that the foil was bad was completely correct.  Jack immediately took me under his wing and led me over to a stained glass station and began helping me repair and solder my piece.  He patiently stayed with me as I nervously worked, and I could see everything coming back together.  Unfortunately, I had left at home the pieces of glass I had pulled out the night before, so he couldn't help me put them back in, yet.  After a few hours, I realized that I needed to leave before rush hour traffic hit, and Jack graciously invited me back the next day, not only to work on my piece, but also to review my supplies and make sure there is nothing else that would cause major issues like the bad foil.

The next day, I loaded up EVERYTHING I owned related to stained glass and made my way back to Anything in Stained Glass.  Again, I was incredibly impressed with the staff.  Even though Jack was the one primarily assisting me with reviewing my tools and repairing my glass, other members of staff dropped by to observe my progress, learn from Jack, and add their own knowledge and experience.  Even though the store closed at 5:00, Jack continued to work with me well after closing.  All in all, Jack and his family have gone above and beyond - in ways that you just don't often see anymore. 

Jack and his daughter, Paula.  Paula is the proprietor of this incredible store.


As you can see, the piece is actually moving forward!!! I actually have a shot at getting it completed!

Wednesday, November 7, 2012

Frustration Abounds

So yesterday was both extremely productive and extremely frustrating.  By the end of the evening, I was practically in tears and ready to throw out the entire project.  I started by attempting to complete the foiling of the project.  I spent most of the day recutting glass and making sure everything fit just perfect.  By early afternoon, the foiling project was complete!

Foiling Complete!

After foiling, I began rough soldering.  First, I painted flux on the copper and soldered the pieces of glass together at the joints.

Joints Soldered!


Once that was done, I could remove the metal bars thumb-tacked around the piece that held everything in place.  I then painted flux over all of the copper and began rough soldering everything.  And that is when everything started to go wrong.  I believe some of the flux seeped under my foil and caused it to unstick.  At first, it wasn't too bad - I lost an eye on my mushroom, but I'm pretty sure it's easily fixed.
Rough Soldering on Side 1 Complete

I completed the rough soldering on the first side, went to flip the piece over, and that's when I discovered that the flux had also seeped under some of the other foil in ways that are not easily fixed.


At this point, I'm not really sure what to do.  I've found some info on the internet that suggests that I have to find a way to remove these pieces of glass, clean them, refoil them, and reinsert them somehow.  I've already contacted my wonderful instructor, so we will see what he has to say about it.  All in all, I'm pleased with the progress I made yesterday, but I'm also so disappointed, I could cry.

Monday, November 5, 2012

Foiled Again!

This past weekend was both incredibly productive and incredibly frustrating at the same time.  I decided to take the weekend and attempt the rather daunting task of recutting the pieces suggested by my instructor and completing all of the foiling on my 77 piece Mario project.  By the time hubs called it bedtime on Sunday night, I had foiled all but 8 small pieces (yes, I had completed 69 pieces), so I feel like I achieved quite a bit.  Of course, I must admit I was more than a little upset at missing my goal by just a handful.  I am hoping to complete foiling tonight and be able to begin soldering tomorrow.  But enough about that, let's see some pictures!!!

Saturday's Foiling

As you can see, by the end of Saturday night, I was close to halfway.  Unfortunately, I was set back by the need to recut a number of pieces when I started.  And then I was further set back by dropping a piece that I had spent a *very* long time getting the foil just perfect.  Sadly, it broke, and I had to recut that piece and start over with the foil.  There might have been much cursing and gnashing of teeth.

Sunday's Foiling
So now I have most of the foiling done.  I still need to complete the teeth and the spots on the piranha plant on the top right, but those pieces are MUCH easier than many of the other pieces I've already completed.

So why does foiling take so long?  It's all about precision.  First of all, everything that you see in the above picture that is shiny copper will be a black lead line when I am done.  You don't want a lot of foil on one side and little or no foil on the other, or the completed piece will look odd in the light.  Secondly, no matter how precise your (or at least *my*) glass cuts were to start with, foil adds a thickness in between.  This means that I have to constantly be checking the fit of the pieces and possible grinding them down a little here and there.  A good example of this is my incomplete piranha teeth:

The pieces no longer fit together perfectly
If you look at the blue piece next to the foiled tooth, you can see how it overlaps the next tooth.  This is because the foil on the pieces next to it has made the fit too tight.  I will need to grind down the blue piece more before I foil it so that it will fit properly.

Lastly, I think everything is taking so long is that I'm a bit of a perfectionist.  This is only my second piece of stained glass, and I really want it to come out exactly right.  I'm probably spending unnecessary time making sure everything is just so, but I can't seem to help myself.  Hopefully the final product will be totally worth it!

Sunday, October 7, 2012

Mario glass cutting complete!

So I've completed cutting all of the pieces for the Mario glass project.  There are a few pieces that don't fit quite right, so I'm thinking of recutting them, but here you can see the project in all its current glory. 


My next step is to start adding copper foil around the edges.  I don't currently own any foil and I want to talk to my instructor about a number of items, so I'm scheduled to meet with him in about a week.

Friday, October 5, 2012

Mario Update

I don't really have a lot to say, but I thought I would at least update my pictures.  I am at least 2/3 done cutting the glass.