Showing posts with label Mario. Show all posts

Wednesday, November 14, 2012

Mario COMPLETE!

On Monday night, I completed the solder on the Mario piece.  I decided that I wasn't sure if the edges would fit perfectly into the wood frame, so I didn't want to put the patina on the piece until I double checked everything.  So Tuesday, I loaded up my miter saw, patina and wax, and my stained glass, and made my way back to Anything in Stained Glass.  Jack helped me check everything fit into the wood framing material and then we patina-ed and waxed the Mario piece.  After that, we pulled out the miter saw a cut the oak framing material to fit the piece.  We screwed everything together, and VOILA! the Mario piece is complete!

Here it is in all its glory!

I've already designed my next two pieces of glass, both based on the fabulous game Glitch.  The first piece is for a secret santa, so I will hold off posting the blogs on it until it is complete and mailed off.  Luckily, it is a small piece, so I should be able to post things rather soon.

Tuesday, November 13, 2012

One Step Back, Two Steps Forward!

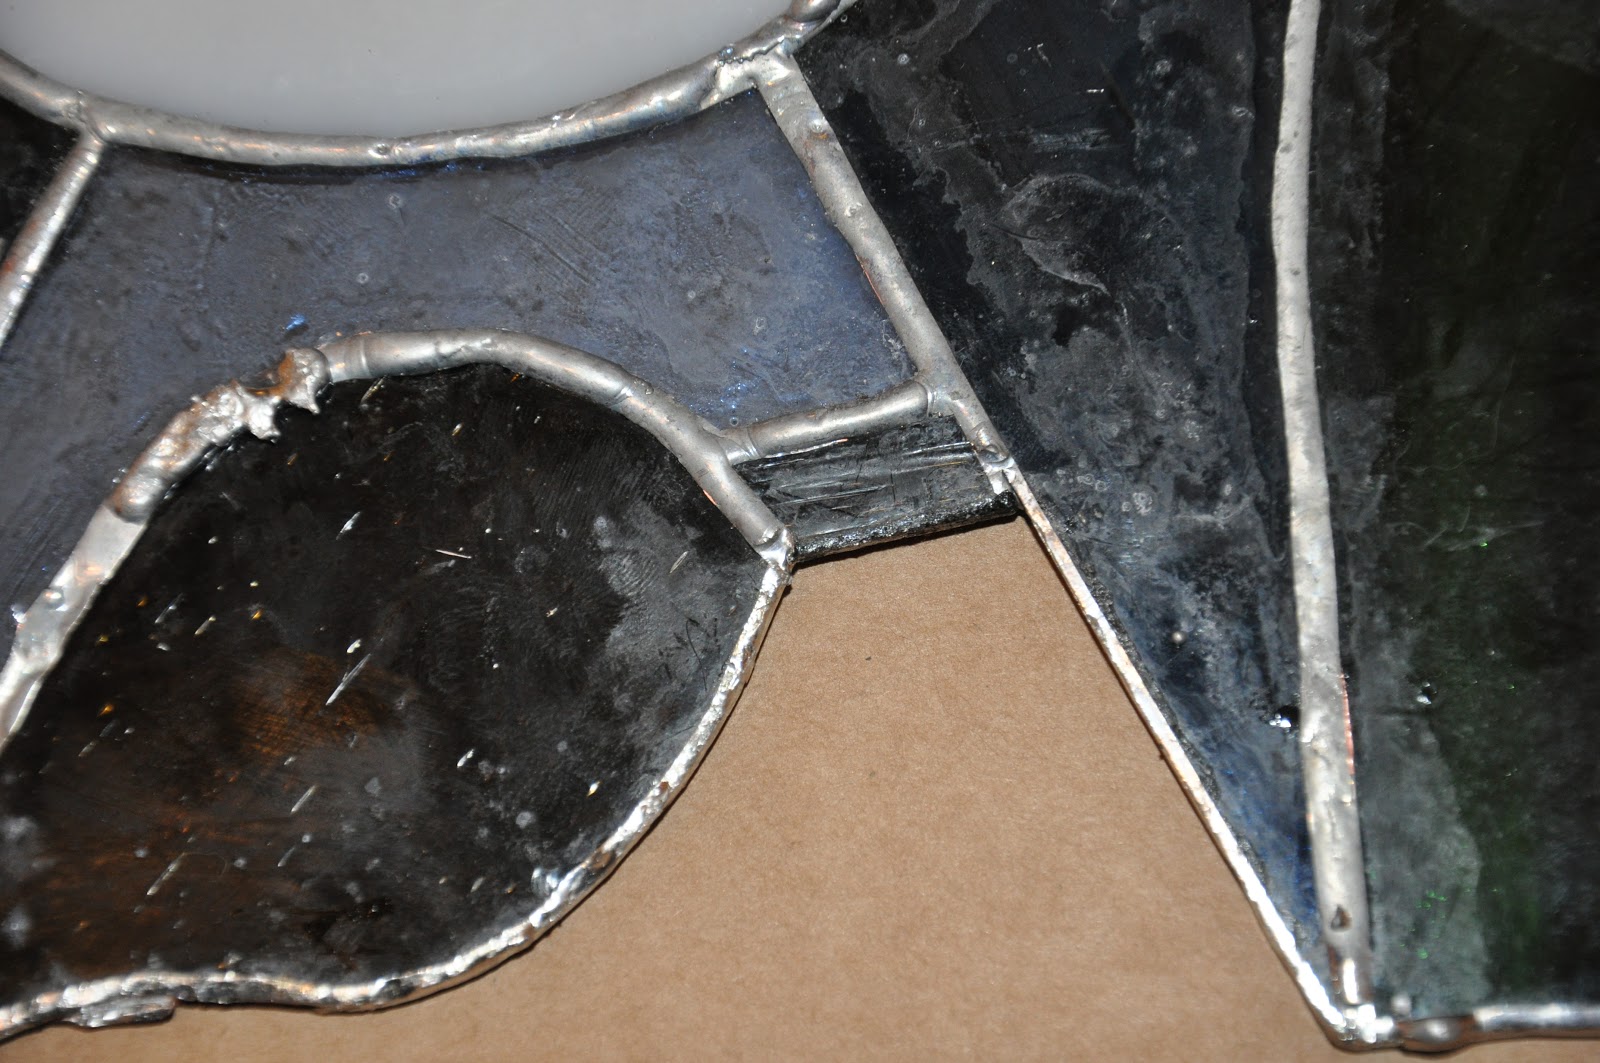
So after a highly successful trip to Anything in Stained Glass, I came home and continued working on soldering my Mario piece.  Everything was going along swimmingly until I committed a fatal error.  I'm not sure exactly what I did, but I suspect I used the hot soldering iron to pick up some solder on a piece of glass, which caused the glass to crack.

It's kind of hard to see, but I've circled the crack in the glass.

After muttering a few words that I shouldn't repeat here, I decided that this piece was too nice to allow a cracked bit to remain.  I did some research on the internet and found a website explaining how to remove the old piece:  http://www.freepatternsforstainedglass.com/repairing-copper-foil.html

First I took my glass cutter and scored the broken piece, then I tapped the underside.  This created more breaks in the piece until I could finally pull some of it out with needle nose pliers.


 After pulling out the first piece, I began carefully pulling out all the other pieces and using my soldering iron to weaken the join between the foil on this piece and the pieces surrounding it.  Once I did that, I pulled out the old foil and removed all the extra solder possible, leaving me with a perfect hole where the broken piece used to be.

Sorry - I took this picture from the back side, but you get the idea.
Then, I cut a new piece and ground it until I could get it to comfortable fit in the hole.  I foiled it and then prepared to put it in.  This step has one tricky bit - the solder on the other side means that you can just lay the piece in - it will fall through and be at the wrong height.  The instructions on the website above suggests laying some quarters down underneath your new piece and using them to get the correct height.  The problem with this solution is if your beads of solder on the backside aren't perfectly quarter height, you are out of luck.  When Jack from Anything in Stained Glass assisted me with refoiling and inserting the pieces of glass that I had pulled out of the edge, he showed me a really great trick.  You take part of a business card, and you fold it in half twice lengthwise.  The cardstock then creates a slight spring to it.  If you slide that under the piece you are working on inserting, the piece will lift.  You can then press it lightly down to the corrected height and tack it into place.


Once I did that, I could then rough solder the piece and then complete the finish soldering.  As you can see, it's nearly impossible to tell that the piece of glass was replaced.


And now, you can see what the soldering looks like now that it's mostly complete!


All that's left is to patina the solder, wax it, and frame the piece. 

Monday, November 12, 2012

Best Stained Glass Shop EVER!

So I was moving right along in the Mario stained glass piece.  In my spare time, I was already designing my next piece, and I knew I needed some new colors of glass.  Last Wednesday, I did some research and found a stained glass shop in Frederick, MD, and I went up there to buy glass.  I walked into Anything In Stained Glass and was immediately impressed by their selection.  This place was a WAREHOUSE of different types of glass.


I probably spent two hours just wandering the store and trying to pick just what I needed.  I had some difficulty finding the exact color I wanted, but the staff were incredibly helpful and after scouring the store, I chose a bunch of pieces and headed to check out.  I happened to mention that I had no crates to store my glass in and the staff threw one in for free. ("We were just going to throw it out anyway.")  While checking out, I spoke to the staff about my foil issues on the Mario piece.  They had some suggestions, but the thing that really stuck in my mind was that they asked what type of foil I was using.  Evidently, the sticky on the foil can age and easily lose its adhesive properties, especially for certain brands of foil.  I had no clue what foil I was using, but once I got home I began really looking at the foil.

After doing some research, I determined that I should probably remove the pieces where the foil was coming off.  This led to a complete disaster and a lot of tears.  As I would remove one piece, foil from the next piece would come off and one piece of glass broke.  By the end of the night, I was certain that I would have to take the entire piece apart, buy new foil, refoil everything and in essence, start over.  Needless to say, I was in tears and almost determined that I would quit stained glass.

Pieces removed due to bad foil

More foil coming off!

The foil came off the Tanuki leaf when I pulled out the piece below it!
More foil came off!


So Thursday, I packed up my sorry piece of stained glass and a package of the suspect foil, and made my way back to Anything in Stained Glass to buy new foil.  I walked in the door, and was immediately greeted by staff who remembered me from the day before.  I quickly learned that Anything in Stained Glass is a family-owned store, and they really treat their customers like members of the family.  Jack, the patriarch of the family, came over as I explained the problem and asked to see the Mario piece.  As I talked with him, we determined that my suspicion that the foil was bad was completely correct.  Jack immediately took me under his wing and led me over to a stained glass station and began helping me repair and solder my piece.  He patiently stayed with me as I nervously worked, and I could see everything coming back together.  Unfortunately, I had left at home the pieces of glass I had pulled out the night before, so he couldn't help me put them back in, yet.  After a few hours, I realized that I needed to leave before rush hour traffic hit, and Jack graciously invited me back the next day, not only to work on my piece, but also to review my supplies and make sure there is nothing else that would cause major issues like the bad foil.

The next day, I loaded up EVERYTHING I owned related to stained glass and made my way back to Anything in Stained Glass.  Again, I was incredibly impressed with the staff.  Even though Jack was the one primarily assisting me with reviewing my tools and repairing my glass, other members of staff dropped by to observe my progress, learn from Jack, and add their own knowledge and experience.  Even though the store closed at 5:00, Jack continued to work with me well after closing.  All in all, Jack and his family have gone above and beyond - in ways that you just don't often see anymore. 

Jack and his daughter, Paula.  Paula is the proprietor of this incredible store.


As you can see, the piece is actually moving forward!!! I actually have a shot at getting it completed!

Wednesday, November 7, 2012

Frustration Abounds

So yesterday was both extremely productive and extremely frustrating.  By the end of the evening, I was practically in tears and ready to throw out the entire project.  I started by attempting to complete the foiling of the project.  I spent most of the day recutting glass and making sure everything fit just perfect.  By early afternoon, the foiling project was complete!

Foiling Complete!

After foiling, I began rough soldering.  First, I painted flux on the copper and soldered the pieces of glass together at the joints.

Joints Soldered!


Once that was done, I could remove the metal bars thumb-tacked around the piece that held everything in place.  I then painted flux over all of the copper and began rough soldering everything.  And that is when everything started to go wrong.  I believe some of the flux seeped under my foil and caused it to unstick.  At first, it wasn't too bad - I lost an eye on my mushroom, but I'm pretty sure it's easily fixed.
Rough Soldering on Side 1 Complete

I completed the rough soldering on the first side, went to flip the piece over, and that's when I discovered that the flux had also seeped under some of the other foil in ways that are not easily fixed.


At this point, I'm not really sure what to do.  I've found some info on the internet that suggests that I have to find a way to remove these pieces of glass, clean them, refoil them, and reinsert them somehow.  I've already contacted my wonderful instructor, so we will see what he has to say about it.  All in all, I'm pleased with the progress I made yesterday, but I'm also so disappointed, I could cry.

Monday, November 5, 2012

Foiled Again!

This past weekend was both incredibly productive and incredibly frustrating at the same time.  I decided to take the weekend and attempt the rather daunting task of recutting the pieces suggested by my instructor and completing all of the foiling on my 77 piece Mario project.  By the time hubs called it bedtime on Sunday night, I had foiled all but 8 small pieces (yes, I had completed 69 pieces), so I feel like I achieved quite a bit.  Of course, I must admit I was more than a little upset at missing my goal by just a handful.  I am hoping to complete foiling tonight and be able to begin soldering tomorrow.  But enough about that, let's see some pictures!!!

Saturday's Foiling

As you can see, by the end of Saturday night, I was close to halfway.  Unfortunately, I was set back by the need to recut a number of pieces when I started.  And then I was further set back by dropping a piece that I had spent a *very* long time getting the foil just perfect.  Sadly, it broke, and I had to recut that piece and start over with the foil.  There might have been much cursing and gnashing of teeth.

Sunday's Foiling
So now I have most of the foiling done.  I still need to complete the teeth and the spots on the piranha plant on the top right, but those pieces are MUCH easier than many of the other pieces I've already completed.

So why does foiling take so long?  It's all about precision.  First of all, everything that you see in the above picture that is shiny copper will be a black lead line when I am done.  You don't want a lot of foil on one side and little or no foil on the other, or the completed piece will look odd in the light.  Secondly, no matter how precise your (or at least *my*) glass cuts were to start with, foil adds a thickness in between.  This means that I have to constantly be checking the fit of the pieces and possible grinding them down a little here and there.  A good example of this is my incomplete piranha teeth:

The pieces no longer fit together perfectly
If you look at the blue piece next to the foiled tooth, you can see how it overlaps the next tooth.  This is because the foil on the pieces next to it has made the fit too tight.  I will need to grind down the blue piece more before I foil it so that it will fit properly.

Lastly, I think everything is taking so long is that I'm a bit of a perfectionist.  This is only my second piece of stained glass, and I really want it to come out exactly right.  I'm probably spending unnecessary time making sure everything is just so, but I can't seem to help myself.  Hopefully the final product will be totally worth it!

Sunday, October 7, 2012

Mario glass cutting complete!

So I've completed cutting all of the pieces for the Mario glass project.  There are a few pieces that don't fit quite right, so I'm thinking of recutting them, but here you can see the project in all its current glory. 


My next step is to start adding copper foil around the edges.  I don't currently own any foil and I want to talk to my instructor about a number of items, so I'm scheduled to meet with him in about a week.

Friday, October 5, 2012

Mario Update

I don't really have a lot to say, but I thought I would at least update my pictures.  I am at least 2/3 done cutting the glass.


Tuesday, October 2, 2012

Return to Mario Glass

Well, after a number of physical and emotional setbacks, I've decided it is time to revisit the Mario stained glass project.  After my last post, I cut my first piece of glass, and I had a terrible time of it - every time I tried to grind the edges, they would nick so horribly, the piece would be unusable.  I spoke with my stained glass instructor, and it turns out that even though the instructions that came with my grinder told me to lubricate it with Vaseline, the grinder would be better off without any lube at all.  Knowing that I had to take apart my grinder and clean all the Vaseline I had put on made me want to put off the project.  Combined with a number of illnesses and depression, I just didn't have the energy to face it.

Now that I've got things under control, I spent a day last week cleaning out my stained glass area and getting the Vaseline off my grinder.  I also took my instructor's suggestion to heart and reverted to the larger sized pattern - some of the smaller items like the piranha plant's teeth will be much easier to see.

With my desk area cleaned, I pinned down the new, larger pattern.  I began cutting new pieces.  I quickly found that the paper pattern was getting too damp from the grinder, making grinding the pieces into the right shape nearly impossible.  I decided to laminate my pattern using packing tape, and this really seems to help.

My pattern has 77 pieces.  So far, I've cut and ground 26, so I'm moving along at a nice pace, as you can see here:

Usually, you start in one corner (like the bottom left), and you work up and out.  However, once I got to the mushroom hat, I had to pull out my second grinder/saw.  It is used for the more intricate cuts, like the egg and piranha plant head.  I have no room on my desk, which means it's currently living on the floor.  I needed to just get those cuts out of the way so I could put the saw up for now, so I kind of skipped ahead.  hopefully everything will still fit in ok.  (FINGERS CROSSED!!!)

I know I've been really bad about update pics (the one above shows about three days worth of work), so I'll try to get more in.  I'm hoping to cut and grind at least a handful of pieces each day, which should mean I'll start foiling within a few weeks.

Monday, June 27, 2011

I'm back!

I had to put my stained glass project on hold for a few weeks - the house needed a serious overhaul and then I had a family emergency that I had to fly home to take care of.  However, today I got back into the swing of things and began moving forward.

I decided that I still wasn't happy with the layout around the yoshi egg - it just seemed off kilter somehow.  So I did a google image search for egg.  I found one that leaned in the correct direction and changed it out for my background.  I then used that image to trace the outline of an egg:


This makes for a final pattern of:


I'm much happier with the way the yoshi egg looks.

Now that I have my final pattern, I have to decide on how big to make the piece.  My first thought was to go roughly 11x14.  However, this made the pattern way too big:

Credit goes to Alex's hand, which was used for scale.

I decided to shrink the pattern down a bit, and I think I'm happier with the result:

Again, credit goes to Alex's hand, which obviously needs a bath.

Now that I have the size of pattern that I want, I need to print out another copy for a total of two copies.  One copy of the pattern will be tacked to the homasote board, and one copy will be cut up, with each individual piece glued to glass to give a precise pattern for cutting.  As you can see in the previous picture, I've already begun numbering each piece on this copy.  This pattern is somewhat ambitious with a total of 77 pieces of glass.  

The pattern I'm attaching to the homasote has more information on it:

Each piece here has three items of information.  The piece number, which matches the piece number in the previous picture, a color designation, and an arrow showing the direction of the glass.  I will be using some glass that has swirls and patterns to it.  When I use glass like that, I need to decide what direction the swirls will be facing, and this is the best time to make that decision.  Of course, if things don't look right, I reserve the right to change my mind at anytime. 

Now that I have filled in both patterns, I need to attach one to the homasote board.  


I'm using specialized metal bars that will not attach to solder - which will be very important later on.

Now, I'm ready to begin the fun part of the process, cutting the glass.  Sadly, I am missing two very important pieces of glass, the light blue and the swirly orange for the fireball.  I am also missing a special saw for cutting some of the more intricate pieces.  I have been informed that the glass and the saw are ready for pickup, but my teacher is out of town.  In the meantime, I can at least show the glass that I do have.  Please note that taking pictures of glass at night without a light box is insanely difficult.  

Green: 

If you look closely, you can see the swirls of darker green in this glass.  This is why the direction of the glass is important.

Dark Blue:


Yellow:


Orange:


Red:


White:


Brown:


Of all of the glass, the red and the brown were the hardest to take pictures of.  The red is a much deeper red than the picture appears, and the brown is more like the right hand side, instead of that orangey color where the light is coming through.  

I'm hoping to start cutting some of the glass soon.  Honestly, I really can't wait for this project to begin moving along! 

Wednesday, June 8, 2011

Designing a Piece of Stained Glass

I've been working in a number of crafting mediums for some time now, and I finally decided to share some of my results/artistic process.  If nothing else, a blog will give me one location to send people when I'm asking for help on a project!

My newest crafting medium is stained glass.  After spending almost two years working on my first piece off and on (my teacher has been very sick and has been in and out of the hospital), I finally finished it!  

Of course, I absolutely loved the project, so even before I was done, I began looking for my next piece.  I wanted something more geeky and less traditional.  I lucked across a page on DeviantArt, and found this awesome piece made out of construction and tissue paper:


Mario Stained Glass by artist DL2288.

Now I had a starting point.  However, to create a piece of stained glass, I need a better pattern.  I've been using trial version of Glass Eye, a CAD program that has been absolutely amazing, to create a workable pattern.  First, I opened the picture of the tissue paper version shown above in Glass Eye.  Then I started to draw out the lead lines (i.e., the black lines you see above).  Each of the lead lines have something called knots, which are points that can be used to attach another line or grab part of the picture.  Here, I have made all of the lead lines yellow for better visibility, and you can see how they match up to the original pattern:


Each of those little dots is a knot.

The pattern is easier to see once I remove the original image and switch the lead lines to black:


The pattern gets even more awesome once I add in some tentative glass pieces:


Here's where I need some advice - while this looks AWESOME in theory, there are some places where the shape of the glass will lead to breakages over time.  For example, the area around the pipe.  This has a sharp u-turn that could easily break along any of the red lines shown here:


There are a number of ways to fix this.  Often, many people choose to have lead lines exactly where a break would be most likely to occur.  I tried this in the pattern, but it started to look too heavy - when you get a bunch of small pieces in one place, often times you only see the lead and not the glass.

Instead, I simply extended the pipe upwards:


This eliminates that u-turn without significantly compromising the look of the piece.

Another area in the piece where issues will occur is the Tanooki leaf at the bottom.  The stem of the leaf is just too small, and the weight of the piece will cause it to crack over time.  This problem is easily remedied:


The last issue on the piece is where I am most stuck.  The piranha plant:


This part of the piece has to be one of my absolute favorites!!  However, the large blue background piece is certain to break - there are just too many weak points.  First, cutting it would be difficult - I can't use traditional methods of a glass cutter and tapping to get such a sharp u-turn.  Even if I use a saw, I would probably lose multiple pieces due to vibration on those sharp turns.  Even if I cut the piece perfectly, there is a strong chance that I would have it break with a heat fracture during soldering.  Sadly, this means I must alter the pattern.  I present to you, the following choices.

The circle:


The  arc:


The arc so it kinda looks like the inside of his mouth:


The square:


The weird cross:


None of these really fit artistically with the awesome look of the tissue paper pattern.  Even if I remove two teeth, I still have the cracking problem, so I've only shown ideas with the four teeth, but I'm open to suggestions.  Does anyone have any suggestions?


EDIT:

Alex had an interesting suggestion:


So now, he looks like he's spitting a fireball.  This gives us a final pattern of:


I'm still open for suggestions, but this might be the final pattern.